Wizard Recommends
-
 $11000 Welcome Bonus
 -
 $3000 Welcome Bonus
 -
 UP TO $777 BONUS
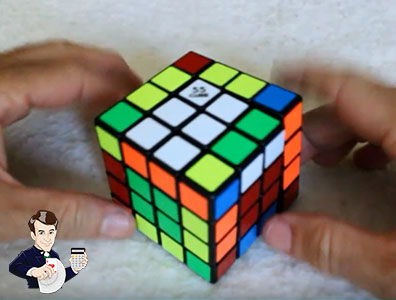
Video Review of Rubik's Revenge -- Part 1 of 2
Simple edge flip algorithm: R U R' F R' F' R
Hi, guys. This is Mike. This is part one of two in my series on how to solve the 4x4x4 Rubik's cube, also known as the Rubik's Revenge. If you like this video, please thumb me, or better yet, subscribe to my Wizard of Odds channel.
In this video…
…I'm going to teach you how to solve everything except for the last layer. I don't think I need to go over any notation because you're not going to need to learn any algorithms for this video. There will be some algorithms in part two for solving that last layer, including dealing with a lot of parity problems. This video will be much more gentle.
Let me make a few announcements before I go any further
Number one - it's going to be a prerequisite that you can already solve the Rubik's cube. I'm going to be using a lot of logic that you should already understand from the Rubik's cube. I'm going to be going a little bit fast because I'm going to assume that you're already pretty comfortable with the Rubik's cube.
Next - let me explain something important, that with any even-numbered cubed, and by even, I'm referring to the number of cubes that are along any edge, there is no center piece like on the Rubik's cube. Because of that, you can have any color that you like in any given center, but if you don't set them up correctly relative to each other, you're going to have a situation where it's impossible to survive.
Most Rubik's cube puzzles of any size are of this configuration where yellow is opposite of white. If you put red on the left with white on the top, you'll find blue here, and opposite of red is orange, and opposite of blue is green. That's the standard color configuration. I'm going to do it on this one, this standard cube. It's called the 55 Cube, but I think that most major brands make them this way.
As a word of warning…
This is my old Rubik's Revenge that I had in high school back in the early '80s. You can see that it's different. Opposite the white, we have blue. If you put blue on the left with white on top, you had yellow here. If your Rubik's Revenge is already mixed up and you're not sure what you have, you can always just solve the colors to figure out how the faces are supposed to be positioned to each other.
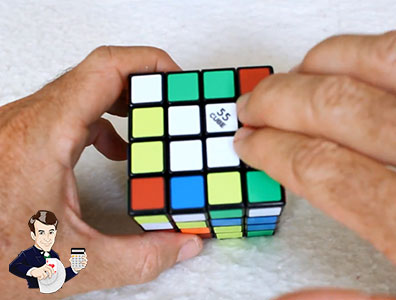
All right. That said, I think we're ready to mix this up and get started. Let's give this a good scramble. This looks nice and scrambled. Step one is to decide which color is going to be your starting face. No surprise, I like to choose white. What we want to start doing is this white center here. In other words, make these four positions all white. You can always find a face where at least one of them is white.
I'm going to assume that you can use some common sense in doing this. For example, you can just swing that up here, so now we got two whites. Then, here's a white, here's a white, so I'm going to rotate this here so I can just swing it up here and these two are next to each other, and then just swing that to the top. There's our white face.
As I mentioned earlier…
…opposite that white face, you need a yellow face. There's already one yellow here. Let's swing up this yellow here, move these two out of the line of fire, and then swing these back so our yellow is still preserved. Here's the other two yellows. We want to get them adjacent to each other. The way I'm going to do that is swing this one to the top, rotate it this way, and then swing it back down so that they're next to each other.
If I were to just rotate this in place, it would mess up the whites. You're going to have this situation a lot. The way to get these two yellows in this side is to move them up where the yellows' already are, and then rotate it 180 degrees. In other words, to get it out of the line of fire. Then, move these yellows back. You can see that preserves our whites as well.
Our white and our yellow centers are done. Next, let's do the red. Remember, if the white is on top-- Well, at this point we can just put the reds anywhere. Here's one red. Let's swing this red into place so we've got two adjacent reds, and then put them on the same row. As a reminder, rows go horizontally and columns go vertically. Here's a red by itself, and here's a red by itself. I can move that so that they're next to each other. Then, put them in the horizontal position, and then just bring these two sets of reds together. Now our red center is done.
As I mentioned before if white is on top, red is on the left, then we need blue on the right. It sure would be tempting to just leave these oranges where they are, but trust me, when you get close to the end, you would have a situation where it's impossible to solve. In fact, you wouldn't even need to get that far, because there are no edge pieces that are red and orange.
What I'm going to do is - let's move these two blues where these oranges are, where they need to be, move them out of the line of fire, and then move these reds back to where they need to go. Here's two blues done. Let's get these other two blues next to each other. Here are two individual blue pieces, so let's bring them together. Then, put them in the same row, and then correct those reds.
Here's two blues and here's the other two blues:
The way I'm going to get these two blues here is to do that same thing that I taught you before with the yellows. I'm going to move these two blues to where these two blues already are, like that, rotate that layer where they are 180 degrees to get them out of the line of fire, and then move these two blues back to where they originally were. Here is my red, my white and my blue. Opposite of red, you need orange.
This is an unusual situation where we have no oranges where they need to be. I know from experience, you don't need to memorize this, but if you have this situation where, basically, these faces need to be completely swapped, you can go like this:
You just rotate one half of it, rotate that top 180 degrees and move them back down, and then do it the other way, move this side to the top 180 degrees and move it back down. Let me show you the situation that you usually encounter.
Let me show you another situation you come across a lot:
Here's our red face, so we need orange on the other side. It's only missing one piece. You put the orange face right here in front of you, and on the top, put that piece that you need in the same position as where it needs to go on the front face. For example, here it needs to go on the top right, so put it on the top right on the top face.
What we're going to be doing is we're going to be moving these two to the top, rotate them, then swing this piece that is currently next to the empty spot on the same row into that position, and then move it back. You may think, "Oh, that's going to mess up other stuff," but trust me, it will work out in the end. I'm not going to explain why because I think I would lose you, so just take it on faith that this is going to work.
Things are in the right position. Top right, top right. I move these two to the top, rotate it so that that blank position is on the other side, and then move these two. This fills in that blank position. Then we're going to move it back to where it used to be. We'll rotate that back and then down. Here, we can see two oranges next to each other, and then move those in place. Rotate that to the left side, and down. Wow. See? The greens. Not only did you solve the oranges, but-- Well, there were only greens left. Those are solved, too. Trust me, it works.
Let me show you yet another situation you'd see a lot. Here's another situation you see a lot - Here's our red face. We need orange on the other side. We need this to be our orange. Let's put it on top. We need to put these two oranges here. Again, just move them to the top, but where there are already oranges, move them to the other side, and then move them back. There you go. It's done, the centers are done.
Let me show you yet another situation you often see. Let me show you one final situation. Here's our red, that means we need orange here. We need two oranges here and there, kitty corner here on top. The way we're going to do this is pretty much doing that situation where there was just one missing one twice.
For example: to get an orange one right here, make sure there's an orange in the same position on the top. What we're going to be doing is basically moving this orange to this position. Move it to the top, rotate it here so it's on the left side, rotate that left side to the top, then rotate these down, and then those back.
Now we have three out of four, so we're back to that situation that I showed you before where there's just one missing one. Again, it's critical that you have it in the same position on the top here. Top right, top right. What we're basically going to be doing is moving this one to this position. Move it to the top, rotate it so that the blank position is on the left side, move this into that place, then move these two back down, and then rotate those and move those back down. That is how you solve the last two centers. I hope you understood it.

Now, we're ready to go on to the edges…
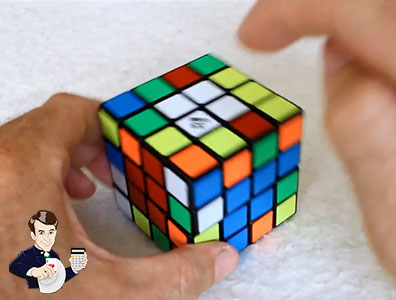
Okay, guys. We're ready to move on to the edges. The way we do that is, first, look for any two that are similar. For example, here's a white and red, and here's a white and red. We want to put them on opposite sides, such that you see the opposite colors and they're in different columns in those cases. Here we have a white and a red. That's good, they're opposite colors, and they're in different rows.
Two, what we simply are going to be doing is basically bringing this in place, but we don't want to mess anything up when we're doing that. What we want to do is we want to make sure we have junk right here. If we're swinging this from the left, we want to have junk on the right.
Here is how that is going to work. We swing that in place, move it to the right side. Then, move it to the bottom. Then, basically, move these whites here back in place. There we go. Our centers are maintained and these two are next to each other.
Basically…
…we just keep doing that over and over. For example, here's a green and orange, let's look for the other green and orange. Here it is right here. Again, opposite, they're in opposite rows. Because I'm going to be moving this on the left side, we want to make sure we have junk on the right. Move it in place, move it to the right side, move it to the bottom, and then correct for those centers. There we go.
Let's do another one
Here we have red and yellow, let's look for the other red and yellow. Here it is right here. Position the other one. Again, on the opposite side, opposite colors. Remember, if we're going to be moving it on the left side, we need junk here on the right. This is not junk. If we do it right now, we're going to mess up these two that we already did. Let's move junk here. Let's move it in, to the right, to the bottom, and fix. There we go.
Let's do it again:
Let's look for the red and the green, move that in place. When I say move it in place, you just have to use your common sense in doing that. We want to have junk here, so let's move junk in that position on the top right. Move it in place, to the right, to the bottom, and clean up after yourself. Let's do it again. Here's blue and orange. Let's look for the other blue and orange. Here it is right here. Let's bring it up correctly. Opposites, opposite colors, opposite sides. Let's have junk on the right, and do it again.
Here's red and blue. Let's look for the other red and blue. There we go. Red and blue, opposite sides, junk, we're ready to go. Let's do it again. Here's white and green. Where's the other white and green? It's right here. Junk is on the right. Here's blue and yellow. Where's the other blue and yellow? There it is right there. Here, it's the same color. Let's fix that. Let's get junk on the right. This whole layer is done. There's some junk, one, two, three, four, five.
Let's do another one, the blue and white. Where's some junk? Here's some junk. Move it in place, right, bottom, and clean up. Let's look for another one. At this point, we're painting ourselves into a corner. This doesn't happen often, but it looks like it's done. These are done, these are done, and these are done, but that was too convenient. Let me gaff a situation that you usually come across when you've painted yourself in a corner.
All right. What usually happens is that as you're doing all the edges, you paint yourself into a corner where there are two sides that have a mixture of pieces but you don't have a junk slice to do that same maneuver that I just did over and over. What we're going to do here is an edge flip algorithm. I think I said earlier this video wouldn't have any algorithms, so I apologize. This is a fairly short algorithm.
What it does is it just flips an edge. It's at the expense of messing around with other stuff, but it's not going to disturb any of the other edges. It's only messing up stuff that we haven't gotten to yet. Here are our two mixed edges. You want to put them across from each other. If the same type of piece, like here's orange-yellow, orange-yellow are in the same row, then, all you have to do is move the other piece to the other row.
We're going to do this algorithm to flip these two. That will flip this orange and yellow to the top, and then we can just move it back. Both of these will be orange and yellow, and both of these will be green and orange. Again, we're going to move this here to flip these two. You want to put these two that you want to flip on the front right-side, and then you do the following. Right upper, right prime, front, right prime, front prime, right, and then move it back. There we go. Both of these are done.
Let me show you one other situation that you will encounter a lot.
All right. I gaffed this situation because you see it a lot. Here, again, our two mixed edges are orange and green, and orange and yellow, but this time, the same type of piece are not on the same row. If we were to switch this green and orange to here, it would just switch these two and we would be left off with the same problem. What we're going to do is take these two and do a 180 degree turn. Now, this orange and yellow that was previously on top is now going to be on the bottom where we want it. Then, move this piece from this incorrect edge to the top of it.
Now, we can flip these two. That will put the orange and yellow to the top, and then we just move it back here. We do that same algorithm that I just said. Remember to keep the two you want to flip on the front-right side. Right, upper, right prime, front, right prime, front prime, right. Then, move them back. There we go. These two are done, and these two are done.
We have now pretty much…
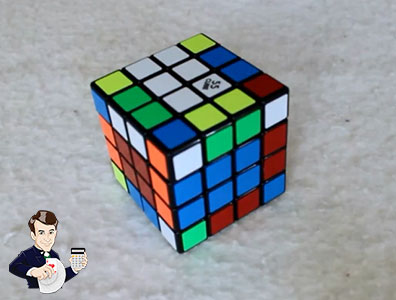
…reduced this to a Rubik's cube where we just have corners, edges, and centers, but usually, you will encounter some parity problems. I will explain how to deal with those in part two. I promise that I would at least take this through solving it to the last layer, so let me do that. Let's get this to the last layer via the same method that you would solve a Rubik's cube. I'm not going to explain it very carefully because I said that it's a prerequisite that you already be able to do the Rubik's cube. That is what I am doing now.
Whoops! If you don't know what I'm doing, I already have a three-part series on the Rubik's cube which will tell you exactly the method that I'm using to solve it right now. One more corner and edge to go. Separate them. As promised, we have everything done except for the last yellow layer here. You can see these top three layers are all done. I can already see that we don't have an edge parity. Let's save that for video number two.
Thanks, guys, for watching. This video was brought to you by my website, WizardOfOdds.com, which is all about the mathematical analysis of casino games. If you've every wondered what the odds are or how to play any casino game, please check it out. If you like this video, and hopefully you did, please thumb me, or better yet, subscribe to the channel.
Thanks for watching. I'll see you in part two. Bye, guys.
External Links
The Joy of Cubing — Discussion about cubing in my forum at Wizard of Vegas.